


“Welcome to RoofWise Issue 2. This time our Technical Manager Steve Cleminson (right) talks about how to weld membranes securely. So remember to follow his five point guide to ‘welding success’.
Steve leads Design and Technology’s Technical Team comprising three technical office support- based staff, six field technicians and the training academy team.
“An honours graduate in Building Construction Technology, he is a member of the Senior Management Team and has been with the business since 2007.”
RW2welding

1. Check the power supply for other demands which could lead to fluctuating voltage and reduction in gun temperature.
2. Keep your nozzle clean using a wire brush to avoid any build-up of carbon deposits.
3. Make sure overlap widths are correct e.g. for mechanically fixed scenarios compared to bonded.
4. All membrane seams must be welded up on the day of laying; and incorporated into any night joints.
5. Protect your heat gun’s element by allowing it to cool down and to avoid risk of burn injuries.
RW2weldingmembranessecurely

 By Steve Cleminson, SIG Design and Technology’s Technical Manager.
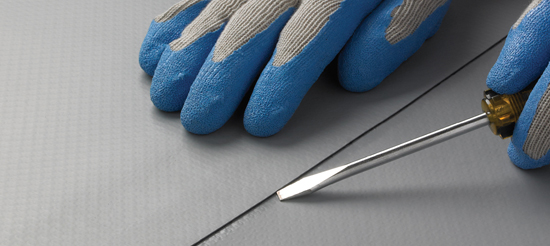
Cleaning and Test Welding
Achieving a good weld relies on a number of factors. So, how do you know if the seam or area needs to be cleaned? There should be no need to clean weld area on newly unwrapped membrane but if any of the pieces of membrane are old or soiled, first they should be prepared by scrubbing with a brush using warm soapy water, then thoroughly rinsed and allowed to dry prior to the use of an applicable cleaner.
Perform a test weld to check the need for further cleaning. The cleaning process should be repeated as necessary depending on the level of contamination and additional chemical cleaning maybe required.
Test welding should always be undertaken at the beginning of each work session to ensure settings on the gun and speed of weld are correctly balanced with the pressure being applied.
Tack Weld
Next, make sure the membrane doesn’t move as you are welding it. The membranes should be tack-welded together with a light, breakable tack. Note that it is essential that these tacks are breakable, especially with mechanically fixed installations. Remember that when the membrane pillows during high winds, these tacks will be put under stress and if they don’t break then, the membrane could become ‘holed’. Once broken, any stresses are transferred to the back of the pre-weld so that the load is uniformly distributed and there won’t be any ‘holing’ at the overlap.

Pre-weld
Membrane seams should usually be undertaken in two passes. The first pass ‘pre-weld’ is set 30 mm back from the leading edge and acts as a continuous air trap which ensures minimal heat loss during the final weld stage.
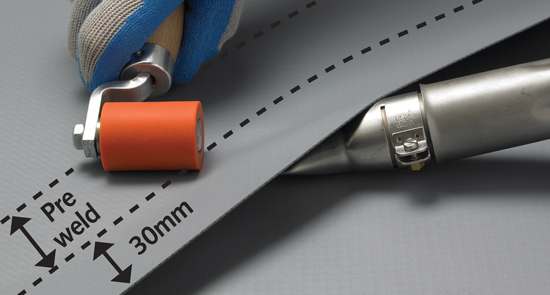
Final weld
The second weld is completed to the front 30 mm of the weld zone, effectively extending the pre-weld to the leading edge of the membrane.

Weld window
Welding must be undertaken within the ‘weld window’ of the specific membrane. to ensure that a secure weld is achieved, refer to manufacturer’s instructions and expect variation on temperature, speed and choice of roller; e.g. reinforced membrane can be welded at a higher temperature than unreinforced / detail membrane.
Seam check
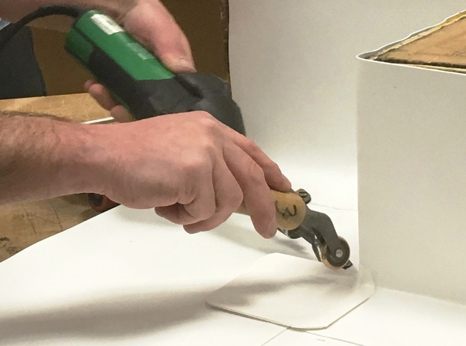
Once the seams have cooled completely, they must be checked using a seam probe.
RW2fieldtechnicians

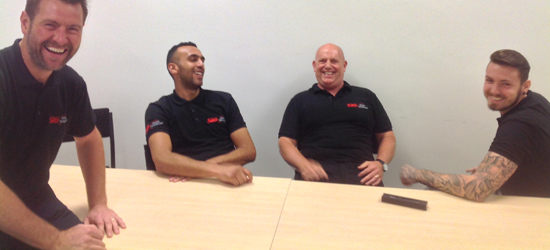
The job of SIG Design and Technology’s team of six field technicians is to support our DATAC contractors, both on the roof top and in the Training Academy. They visit sites to monitor and inspect workmanship; and as they’ve all been installers in their day, can offer timely advice on a raft of issues as they crop up.
L to R: Nigel Fields, Danny Meadows, Paul Jacobs and Jordon Hughes.
RW2greenroofing

training
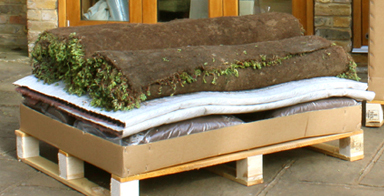
VerdiRoof – arrives all on one lorry!
Offering same-day results, our VerdiRoof green roof is really easy to use. There are 10m2 of VerdiRoof per pallet and up to 250m2 can be delivered in one load. Suitable for a warm/inverted roofs, choose from sedum blanket, plug plants and seeding options.
RW2training

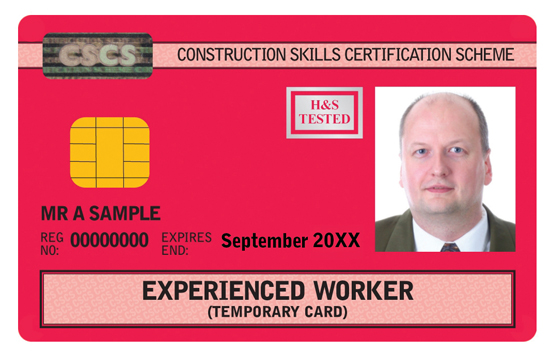
As part of a key initiative between SIG, CSCS, SPRA and Roofing Industrial Alliance, trainees who have passed a D & T training course in IKO Armourplan or Rhenofol single ply and hold the Working at Heights test can now apply for a three year Experienced Worker red CSCS card which is non-renewable. Normally valid for 12 months, the longer period allow trainees to complete the NVQ or SVQ within the three years and they must register for the formal qualification within 18 months of the single ply course. CSCS expects that the card will be replaced by a skilled five year card when qualified.
And in our next issue: Read about the extensive work of our Academy in RoofWise issue 3 which focuses on Training.
RW2contacts

Daniel Bosworth, Design Manager
Jorge Bonet & Matthew de Jong, Technical Support Advisors
Sara Bexley, Roofing Academy Manager 01509 501 738
General enquiries: 01509 505 714
Technical help: 01509 501731
Email: [email protected] or [email protected]

Recent Comments